Introduction
The ideal scenario for a performance analyst is to achieve maximum efficiency with minimal administrative overhead. Once you have access to an HPC system, you should not need to take any further action — meaning no more data copying, local (cube) client installations or tedious downloads. The aim is to take a measurement on the remote HPC system and start analyzing the results on your local laptop or workstation immediately. This streamlined workflow is now possible through JupyterLab, which provides a seamless, browser-based interface to HPC systems such as the JSC's JURECA and JUWELS production systems. Using this approach completely eliminates the need for local installations. Analysts simply log in via their web browser to gain immediate access to a working environment equipped with both a console and CubeGUI. This enables performance data to be analyzed in situ on the HPC file system, eliminating the need for explicit data transfers. Furthermore, work can be paused and resumed effortlessly, even in the event of network interruptions.
HOWTO for User
The process is incredibly straightforward. After authenticating to the HPC system, simply launch your JupyterLab instance in your browser. In the JupyterLab interface, navigate to the application list and select the CubeGUI extension. This automatically starts the server-side Cube service and loads the graphical interface into your browser window.

Fig. 1: Using the built-in file explorer, you can locate your .cubex performance data on the HPC’s parallel file system.
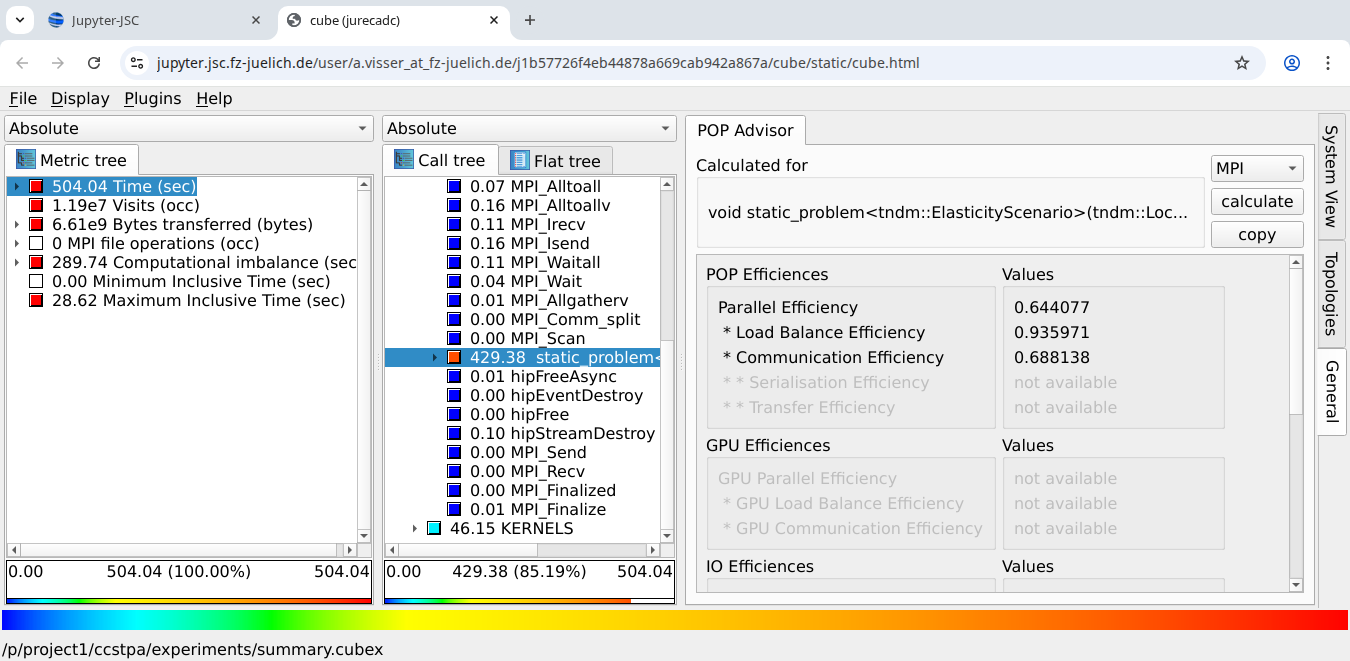
Fig 2: Once opened, you can proceed directly to interactive analysis, viewing call paths and selecting metrics. The WSM CubeGUI client is functionally equivalent to a “regular” local CubeGUI installation. You can even execute specialized plugins like POPAdvisor to get a high-level overview of application behavior without any local setup.
HOWTO for System Administrator
Technically, this (user-side) "zero-installation" user environment is realized through a client-server architecture, with the browser acting as a thin client. On the client side, CubeGUI is compiled into WebAssembly (WASM) and communicates with the server via WebSockets. The server side utilizes a Python-based Cube Web Service which interfaces with the CubeServer via Unix domain sockets. A JupyterLab Server Extension manages the service's entire lifecycle, starting and stopping it as required to ensure it is always available. It also handles proxying requests from your browser to the underlying service.
If you have already installed JupyterLab on your HPC system, the system administrator can make Cube easily accessible via a straightforward process involving three components. They need to install the CubeLib library, the Cube Web Service and the JupyterLab extension. These can be installed using standard package management tools such as pip, EasyBuild or Spack, which ensure that the installation is optimised for the specific HPC architecture. The Cube Web Service acts as a Tornado-based WebSocket proxy and provides system-independent WASM binaries for the client. Finally, the Jupyter Cube Proxy extension provides the launcher icon in the interface and manages the proxy requests. This setup requires minimal configuration, primarily the specification of the URL path and the location for user-specific sockets.
To make Cube accessible via JupyterLab, an administrator must set up three core components: the native processing library, the web-backend service, and the JupyterLab integration. Here is a breakdown of the commands an administrator would execute to establish this environment:
Installing the Native Core (CubeLib)
The backbone of the system is the CubeLib library, which includes the cube_server and the low-level logic for handling performance data. The most reliable way to install this on an HPC system is using a package manager like Spack or EasyBuild, which handles the complex dependencies and architecture optimizations automatically.
Using Spack:
spack install CubeLib
spack load CubeLib
Using EasyBuild:
eb CubeLib-4.9.1.eb --robot
module load CubeLib
Install JupyterLab in virtual python environment (Optional)
python3 -m venv venv
. venv/bin/activate
pip install jupyterlab
Download Cube Jupyter Lab Components (for Cube V4.9.1)
wget https://apps.fz-juelich.de/scalasca/releases/cube/4.9/dist/cube-webservice-4.9.1.tar.gz
wget https://apps.fz-juelich.de/scalasca/releases/cube/4.9/dist/jupyter-cube-proxy-4.9.1.tar.gz
tar -xzf cube-webservice-4.9.1.tar.gz
tar -xzf jupyter-cube-proxy-4.9.1.tar.gz
Installing the Cube Web Service
This Python-based service acts as the bridge between the native server and the browser. It serves the system-independent WebAssembly (WASM) binaries for the GUI and manages WebSocket communication.
Using pip:
cd cube-webservice && pip install .
Setting up the JupyterLab Extension
The final piece is the Jupyter Cube Proxy. This extension provides the "Cube" icon in the JupyterLab Launcher and handles the routing of browser requests to the backend web service.
Using pip:
cd jupyter-cube-proxy && pip install .
Environment for Execution
Note: If cube_server is not in the default system path after step 1, the admin of the Jupyter Lab should set the CUBE_SERVER_PATH environment variable.
export CUBE_SERVER_PATH=/--PATH-TO--/cube_server
Availability
This feature is available with version 4.9.1 on Cube Framework. For download please visit https://scalasca.org